Showing posts with label drug store. Show all posts

Makeup Revolution; Fierce as Fire Palette Review and Tutorial


Makeup Revolution; Fierce as Fire PaletteHello everyone and welcome back to my blog! I recently made an Ulta purchase, and with said purchase if I spent $15 on Makeup Revolution products, I received their Fierce as Fire eyeshadow and highlight palette Free. I felt like this was a great opportunity to not only get a new palette, but it could make for some good content. I know they had a little bit of a bad reputation when they first came out because they were coming out with a lot of obvious dupes... I do have to say that they've made an honest name for themselves over the last year, not only that but I've liked everything by them. The quality of their products just seem to be too good for the price, but their stuff keeps getting better and better.


Makeup Revolution; Fierce as Fire Palette


The Review: The packaging is all plastic like their palettes normally are, and there isn't a mirror. The package is sturdy, pretty lettering and trim to match. There are 8 eye shadows and 4 highlight shades. The eye shadows have 4 shimmers and 4 matte shades. Two of the matte shades have a fine shimmer in them, but it doesn't show up on the eyes. The 4 shimmer shades are all very silky quality and shimmery. As for pigment of the shadows, everyone of them is so pigmented and smooth! The blendability is very smooth, I tested them over unset foundation to really test if they would be patchy. The shades went on buttery and pigmented, the shimmer shades are super shimmery and pigmented as well. As for the highlight shades, holy cow I was blown away with the pigmentation and creamy texture of them. They're all really shiny ad blinding as well. I was only able to test out the three shades on my cheekbones, the fourth one is too dark. It is very beautiful on the eyes though. The highlight shades are beautiful mixed as well! The palette is overall a 9/10, it would be a 10/10 if there were a mirror!


Makeup Revolution; Fierce as Fire PaletteThe Tutorial: Starting out this makeup look I primed my eyelids with my foundation and left it tacky to test the quality of the eye shadows. Starting out I went in with the light pinky tone and the cooler tan matte shades on a natural fiber brush and brought them through the crease and bringing the color all the way into the inner portion and above the crease. I have hooded eyes so I always bring my shadows higher than people usually do. Next to build up the outer crease area, I picked up the more red brick shade on a fluffy blending brush and went in lightly. It was super pigmented so I didn't have to add too much more than the initial dip in. I did make sure to bring that color into the inner corner as well, but very lightly just to add warmth. On the lid with a flat shader brush and some Mario Badescu rose water spray I dipped into the peachy pink shimmer shade and put it all over the inner two thirds of the lid. This color is beautiful! It's a duo chrome eyeshadow, it goes from pink to golden yellow. I used the same wet brush and picked up the darkest highlight shade and put it on the mid section of the lid gently patting out the edges. This look was finished with the lightest highlight on the brow bone and a thin line of black pen liner on the lash line.


I hope you enjoyed today's makeup tutorial. I absolutely loved this palette and can't wait to see what I create next! Makeup Revolution is slowly but surely becoming my favorite makeup brand! I just got their  Luxury Baking Powder in Lace and their new concealer in c3, light for neutral undertones. I've tried them roughly three times so far and I've gotta say I love their stuff more and more with each new product I get my hands on. I can't wait to try more! I'm almost at 100k views and it's all thanks to you guys and your support!
Xoxo Lulu

Products used today.
Eyes:
Makeup Revolution Fierce As Fire palette
Maybelline Great Lash Mascara, Waterproof, Black
Broadway Beauty eyebrow pencil, brown / black
BH Cosmetics Felt Tip Black liner

Face:
Maybelline, Baby Skin Instant Pore Eraser Primer
(My foundation is mixed half and half in the bottle)
Revlon Colorstay Foundation in 200
Maybelline Matte and Poreless in 120
Makeup Revolution, Conceal & Define Full Coverage Conceal & Contour
Makeup Revolution, Lace Baking Powder
Elf Contour Palette, light
Mario Badescu Facial Spray With Aloe, Herb and Rosewater

Highlight: 
Makeup Revolution Fierce As Fire palette, white and gold

Lips:
Maybelline, Color Sensational, 015 Born With It

Brushes / Tools:
Real Techniques Sponge
Real Techniques, Miracle Complexion Sponge
Pueen Large Powder Brush
Pueen Angled Blush Brush
Generic Flat Packing Brush
Generic Brand Fan Brush
Generic Flat Shader Brush
Generic Natural Fiber Blending Brush


Find me elsewhere: 
Youtubehttps://www.youtube.com/user/LINDAxHELLA
Twitterhttps://twitter.com/Luluslife_blog 
Instagramhttps://www.instagram.com/lindaxhella/ 
Facebookhttps://www.facebook.com/Lulus-Life-Blog 
Pinteresthttps://www.pinterest.com/lindaxhella/pins/ 
Tumblrhttp://lindaxwoods.tumblr.com/


Plum Smokey Eye using Fifty Cent Eyeshadows!

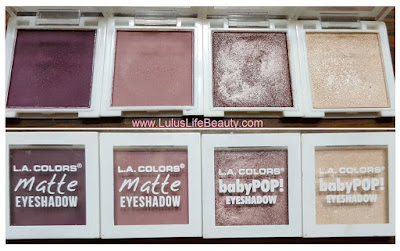
Plum Smokey Eye using Fifty Cent Eyeshadows!Hello everyone and welcome back to my blog! A while back when I was walking around our local Dollar General I discovered L.A. Colors had fifty cent single shadows! There weren't a lot to pick from, so I chose four shades I knew I'd get the most use out of. I chose a matte dusty mauve, a matte deep purple, a shimmery mauve color mixed with a warm brown tone, and the last one is a shimmery nude color. I'm not sure how many they actually had in store, most of the stuff was already picked over and some had been broken and thrown back on the display. They also had some mini glosses and fat liner / shadow pencils. I didn't use those today but they were decent for being so cheap. Right now I can tell you the shadows were pigmented, soft and blendable. The metallic shades were pretty decent just alone, but I did wet the lid shade for that metallic pop of color. Now lets get into the tutorial briefly!


Plum Smokey Eye using Fifty Cent Eyeshadows!
Today's tutorial is accompanied by a YouTube video again like I did a few weeks ago. I'm really liking filming and hope you're enjoying the videos as well. Starting out today's look I did all of my face makeup first and then moved onto the eyes. I primed with foundation and primer, I don't know why. I just felt like it lol, I set the lids with my setting powder for a crease free, blendable surface. This look ended up being super simple to do. I went in with the light mauve shade through the crease, placing down a munch of color to blend the dark purple into. I kept the darker purple in the outer third of my eyelid and brought it in a little further, just in the crease for depth. On the lid I took the metallic purple-ish brown and packed it all on the inner two thirds of the lid. I then decided to wet it to get more of the metallic finish! I took the shimmery nude color all in the inner corner and on my brow bone. The bottom last line is the two matte shades ombre'd out for a smooth transition, along with the shimmery nude on the lower inner corner / bottom lash line area.

I hope you loved today's tutorial and video as much as I do, it was a super easy and fun look to do. I would recommend picking up some of these shadows if you happen to come across them! Let me know if there is anything you want to see my try and test out on my channel and I'll try to make that happen! Down below is all of the products I used today including the tools and my social media links! If you could Subscribe to my YouTube and follow on Instagram, I'd appreciate that! I'm trying to hit 1,000 subs by the end of this year!!
Xoxo Lulu


Products;
Eyes:
Hard Candy Eyeshadow Primer
L.A. Colors Matte Eyeshadow; Secret
L.A. Colors Matte Eyeshadow; Crushed
L.A. Colors BabyPOP! Eyeshadow; Brownie
L.A. Colors BabyPOP! Eyeshadow; Nude Shimmer
Maybelline The Rocket Mascara; Waterproof; Black
Essence Kajal Black Eye pencil
Broadway Beauty Eyebrow pencil; Black / Brown
Elf Clear Brow and Lash Mascara

Face:
Maybelline Baby Skin Instant Pore Eraser
Revlon Colorstay Combo/oily Skin foundation; 200 Nude
Maybelline, Fit Me, Matte & Poreless; 110 Porcelain
Coty Airspun, Loose Powder; Naturally Neutral
Elf Contour Kit; Light
DIY Blush
Elf Mist & Set, Setting Spray

Lips:
Maybelline ColorSensational; 015 Born With It

Highlight:
Carli Bybel Original Palette; both lighter shades

Brushes / Tools:
Real Techniques Sponge
Pueen Large Powder Brush
Pueen Angled Blush Brush
Generic Flat Packing Brush
Generic Brand Fan Brush
Generic Flat Shader Brush
Generic Natural Fiber Blending Brush

Find me elsewhere:
Youtube: https://www.youtube.com/user/LINDAxHELLA
Twitter: https://twitter.com/Luluslife_blog
Instagram: https://www.instagram.com/lindaxhella/
Facebook: https://www.facebook.com/Lulus-Life-Blog
Pinterest: https://www.pinterest.com/lindaxhella/pins/
Tumblr: http://lindaxwoods.tumblr.com/


Pride Month Makeup Tutorial

Pride Month Makeup Tutorial
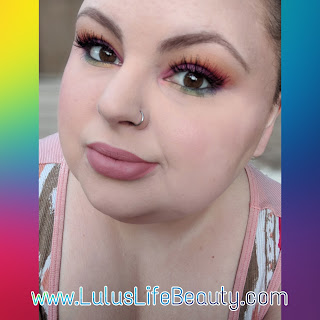
Hello everyone and welcome back to my blog! Also, welcome to June, which is Pride Month! The month where you celebrate who you are and what you stand for! Another large part of pride month is the rainbow, all the colors of the rainbow, acceptance of every one no matter what their sexual orientation. I have friends and family who are gay, bisexual or lesbian who aren’t accepted for who they are. It’s such an awful experience to see someone you care about, not being treated like everyone else is. In honor of pride month I decided to do a rainbow Eyeshadow tutorial. I know this is nothing original, but I love the way this look turned out! I hope you enjoy!


Pride Month Makeup Tutorial
Starting out this look, I primed my eyelids and set them with setting powder. When doing an ombre sort if look with your eyeshadow, you want to go from lightest to darkest working carefully not to muddy up any of the colors already placed. I used two yellows to start out, one a pale inner banana color and then a bright yellow. I took the pale yellow and blended it out almost to the browser, then added the brighter shade a little lower. That’s why I did with all the shades. I slightly overlapped all of them to create the ombre. Next going in with the orange I kept it lower but still brought it in pretty far. Onto the red, I focused it mainly in the outer corner. Over the orange it just kept looking more orange. I couldn’t get it to look red. So I transitioned into the bright purple on the middle of the lid, fading it into the pinks I used. I made sure to pull the pink into the inner corner to connect with the lower lash line later. On the bottom lash line I started with the dark purple, blended it into the blue, then into the two greens and finally connecting yellow in the inner corner with the pink to make an orange. I tried to make it look like it was one blended ombre all around the eye. 

Pride Month Makeup Tutorial

That’s it for my tutorial today! Did you like it? Let me know down below. I personally love this look. I paired it with a nude lip and a set of false lashes! I wanted to keep the lips nude so the focus stayed on the eyes. I also felt that lashes pulled the whole look together. Without lashed it seemed a bit lacking. So I decided they were needed lol. Everything I’ve used is listed below! I listed two foundations, I use half and half to get my color! If you have any questions, feel free to ask me in the comments! One question I have for you guys is, if I made YouTube videos, would you watch and subscribe?!
Xoxo Lulu


Products used today.
Eyes:
Hard Candy Eyeshadow Primer
BH Cosmetics Take Me Back To Brazil palette
Essence Kajal Eye Pencil, Black
Maybelline The Rocket Mascara, Waterproof in Black
Broadway Beauty eyebrow pencil, brown / black
Duo Eyelash Glue
Ardell Wispies False Lashes

Face:
Maybelline Pore Eraser Primer
Revlon Colorstay Foundation, 200 Nude
Maybelline Matte & Poreless, 110 Porcelain
Coty Airspun Face Powder, Naturally Neutral
Elf Contour Palette, light
E.L.F. Cosmetics Makeup Mist & Set
Blush, it's one I made myself!

Highlight:
BH Cosmetics Carli Bybel palette, nude shade

Lips:
L.A. Colors Matte Liquid Lipstick, Vixen

Brushes / Tools:
Real Techniques Miracle Complexion Sponge
Pueen Large Powder Brush
Pueen Angled Blush Brush
Pueen Flat Shader Brush
Elf Defining Eye Brush
Elf Eyeshadow Brush
Elf Flat Contour Brush
Generic Brand Fan Brush
Generic Blending Brush
Generic Natural Fiber Blending Brush

Find me elsewhere:
Youtube: https://www.youtube.com/user/LINDAxHELLA
Twitter: https://twitter.com/Luluslife_blog
Instagram: https://www.instagram.com/lindaxhella/
Facebook: https://www.facebook.com/Lulus-Life-Blog
Pinterest: https://www.pinterest.com/lindaxhella/pins/
Tumblr: http://lindaxwoods.tumblr.com/


My Effortless Makeup Look!


When I have to run errands and I don't want to do a full face of makeup, this is my "go-to" look. I still use a fair amount of products, but it is a more natural everyday kind of look. It's for those days when I don't have the time or energy to "Beat my face to the gods". There are a few different eye looks I'll do, but this is my usual look. I hope you enjoy!


First things first, I always wash my face with a charcoal face wash and a normal wash cloth. I've noticed if I don't wash my face just before I do my makeup, it doesn’t sit right. I often have breakouts and dry skin around my nose and chin, so washing and rinsing my face well is always a must! The face wash I use is Biore Deep Pore Charcoal Cleanser, it's has a cooling feeling and does seem to work. It’s honestly really thick and has little black flecks of charcoal in it. If I leave it on for more than a minute or two, my face starts to tingle and feel warm. So I just wash it off and move on to my moisturizer. I have been using the Nicel Daily Repair with Vitamin A and Retinol for about three years. I always got it at Big Lots for less than two dollars, but I have not been able to find it the last few times I had been there. I have seen it on Amazon though! Before I start my makeup, I throw on my chap stick in the flavor Pumpkin Pie.


Now on to the actual makeup! I always do eyes first. No matter what I do, I always have fall out. I start by priming my eyes with the hard candy primer and I put down a matte creamy nude color all over by wet n wild in Brulee. It helps make the rest of the shadows blend better and even everything out. I use the Wet N Wild Pallet in Comfort zone. It has super soft, pigmented shadows. I take the warm pinky brown shade on my lids then put the warm brown / blue shifty one in the crease. It’s comparable to Mac’s Blue Brown pigment.


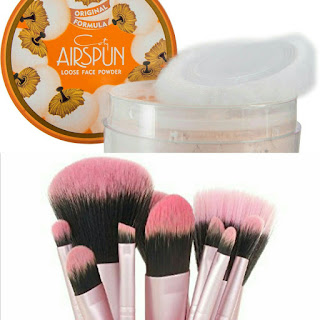
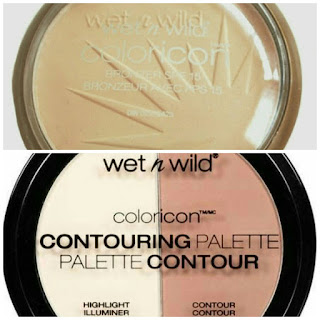
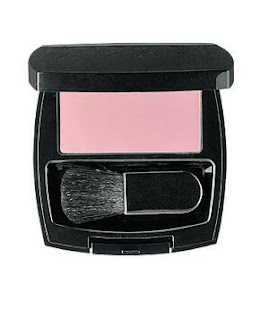
After that, I clean up the fall out and move on to primer and foundation. I mix one pump of my green redness relief elf primer in with two pumps of my covergirl foundation in shade 810. Mixing them like that seems to make my foundation stay on longer than normal. When I’m in a rush, and want my foundation to look natural, I blend it in with my hands. The coverage is still nice and looks so much more natural than if I use a sponge. If needed, I’ll add some extra foundation to any spots and my under eyes with my real techniques miracle complexion sponge. I do have pretty dark circles. After, I set everything with my coty Air spun loose face powder. I love how it smells, it reminds me of my grandma. I always add a Bronzer to the "classic 3" area, if I don’t I look washed out. I like to bronze up with the Wet N Wild Coloricon Contouring Pallet. It also has a matte highlight shade, which I sometimes use under my eyes if I need more brightening. My favorite Blush is my Avon blush in Classic aura. It’s a gentle mauve, and looks really flattering on my skin tone. For highlight, I use the one I made myself. I highlight my cheek bones and above my brow, the tip of my nose and my cupids bow.


Last thing I do is finish my eyes, lips and set everything. I put on Rimmel Scandleyes waterproof "sparkling black" eye liner. I put it in my water line and tight line. Then I use my holy grail Maybelline the rocket mascara in waterproof on my top and bottom lashes. I put on like one and a half coats. focusing on my top lashes. I lightly fill my brows and brush them out in with the Jordana Fabubrow eyebrow pencil in dark brown. Personally, it’s too warm for me, and I’m looking into getting a more ashy one. If you have any suggestions, let me know down below. I use my Elf Mist & Set to keep everything in place and while its drying, I put on some gloss. My favorite is Maybelline The Elixir Colorsensational in shade 90, Rose Redefined. It's one of those glosses that is super shiny and long lasting, but not sticky. It has a grandma smell I love!

Then I’m done! It usually takes me about fifteen to twenty minutes to do it all and feel a lot more confident going out and about. I do have a lot of acne, acne scars and redness on my cheeks that bother me. If I’m having a decent skin day I’ll just wear mascara, eye liner, fill my brows in lightly and wear some chap stick and call it a day. I’m going to have some photos of the products and me throughout the steps! I hope you’ve enjoyed this post and if you want me to do anymore like this with different looks, let me know down below!

Thank you all for reading!
Xoxo Lulu.


Drug store Foundation Routine!


Hey everyone! Today I'm going to talk you through my foundation routine, for days when I do my makeup. I don't always have time to do my makeup on a daily basis, but this is a go to list of products! If you have any feedback or recommendations, hit up the comments! Xoxo Linda.


Elf Mineral Primer

First I start with the Elf Mineral Primer. I use the green one for redness that I have around my nose and on my jaw line / cheek area. I'm not sure what it is, but I do know a lot of women seem to have it. There is a lot of bumpy texture to it as well. I'd say over all this primer does work pretty well for it being from the drug store.


Covergirl Outlast Stay Fabulous foundation, Real Techniques Perfection Complexion spongeSecond, I use Covergirl's Outlast Stay Fabulous foundation in the shade 810, Classic Ivory. It's the second lightest shade with a slight yellow undertone. To apply this I use my damp Real Techniques Perfection Complexion sponge. This is a medium coverage foundation and covers my spots and scars pretty well. I always end up going back to this one. I like to try out other drug store brands that get a lot of hype, but they're never as good as this one. Not to mention I'll use the sponge and dab on extra to cover my dark circles and it works wonderfully! These two are a must have in my collection! But remember, blend down your neck!


Coty Airspun loose face powder, Natural, Pueen 12 piece Brush set, Third! Setting powder! Coty Airspun loose face powder, in Natural. What else can I say? Holy Grail setting powder for sure. I have had the same container of it for almost 2 years and it's still three quarters full, and that's with me using it on my eldest step daughter too! It has a granny smell to it and I happen to love that. It reminds me of my grandma! I use this to set and bake my under eye area. After a few minutes I'll use my fluffy brush and dust off and swirl in any extra. I bought myself a set of Pueen makeup brushes for my birthday almost three years ago, I think it's a set of 12 with a case for travel. It was only twenty buck on Amazon! Heck of a deal. They are so soft and help my powders blend flawlessly!

Wet N Wild Coloricon Contouring Pallet, Dulce De Leche, Wet N Wild Coloricon, Reserve Your CabanaFourth, Bronzing and Highlighting. To warm up my skin and make me look more alive I use the Wet N Wild Coloricon Contouring Pallet in Dulce De Leche. It's a two in one matte Bronzer and Highlighting powder. It's a super soft formula and blends like a dream. I like to use the contour color in the usual 3 shape on the face and the highlight powder under my eyes. It is completely matte! For the shimmery highlight I use again the Wet N Wild Coloricon line, in Reserve Your Cabana. This is a silky soft highlight, it doesn't have a lot of sheen to it. So I actually broke it up and added some frosty eye shadows to it and re-pressed it. Now it works like an actual highlighter should, lol.


Avon Ideal Luminous Blush, Classic Aura,
Fifth and last, Blush! Avon Ideal Luminous Blush in Classic Aura. This is a discontinued color, which is so sad. It's a muted pink color that looks good on so many skin colors! I love this color it's so soft and subtle yet it has awesome pigmentation! I don't know why they don't sell it anymore. I know a family member had given it to my daughter because they didn't use it. Well, she put it all over her face and her face turned beat red and broke out. She was like 7 at the time. I use it every time I do my makeup and I have never had a reaction from it.


Thank you all for taking the time out of your day to ready this. I hope you found it interesting or helpful in some way! Let me know what I should post next!
Xoxo
Lulu.

Drug store makeup!

Hi, my names Linda. As an average 28 year old mom, like most, I cannot afford to purchase high quality makeup and other cosmetic related items. I plan on doing reviews on cosmetics from the drug store, vape related stuff and maybe some easy and cheap DIY's!
Please stay tuned and and take this journey with me! Feel free to leave requests in the comments and make sure to share my blog with your friends!
Xoxo
Linda ♡

Popular Posts